How To Emulate Pinta's Quest For Dreamcast's Skies Of Arcadia
With some (relatively) modern tools, you can experience the VMU-only activity for yourself!
While there have been numerous ways to get the VMU activity working physically even to this day, those who’re stuck with emulation have been unable to tap into it for some time now. With a bit of elbow grease, however, it’s possible to not only play it, but it’ll also be possible to transfer the gold and items you’ve accumulated from it as well!
Step 0. Preparations
Here’s what you will need
Although I tested to ensure both emulators are able to work for this, I recommend Flycast over Redream. It’s more active in development, and is auto-configured to run the Dreamcast Live servers!
Step 1. Getting The Files
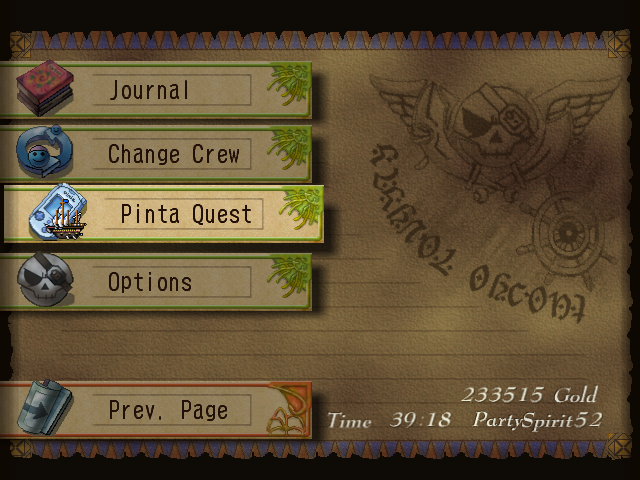
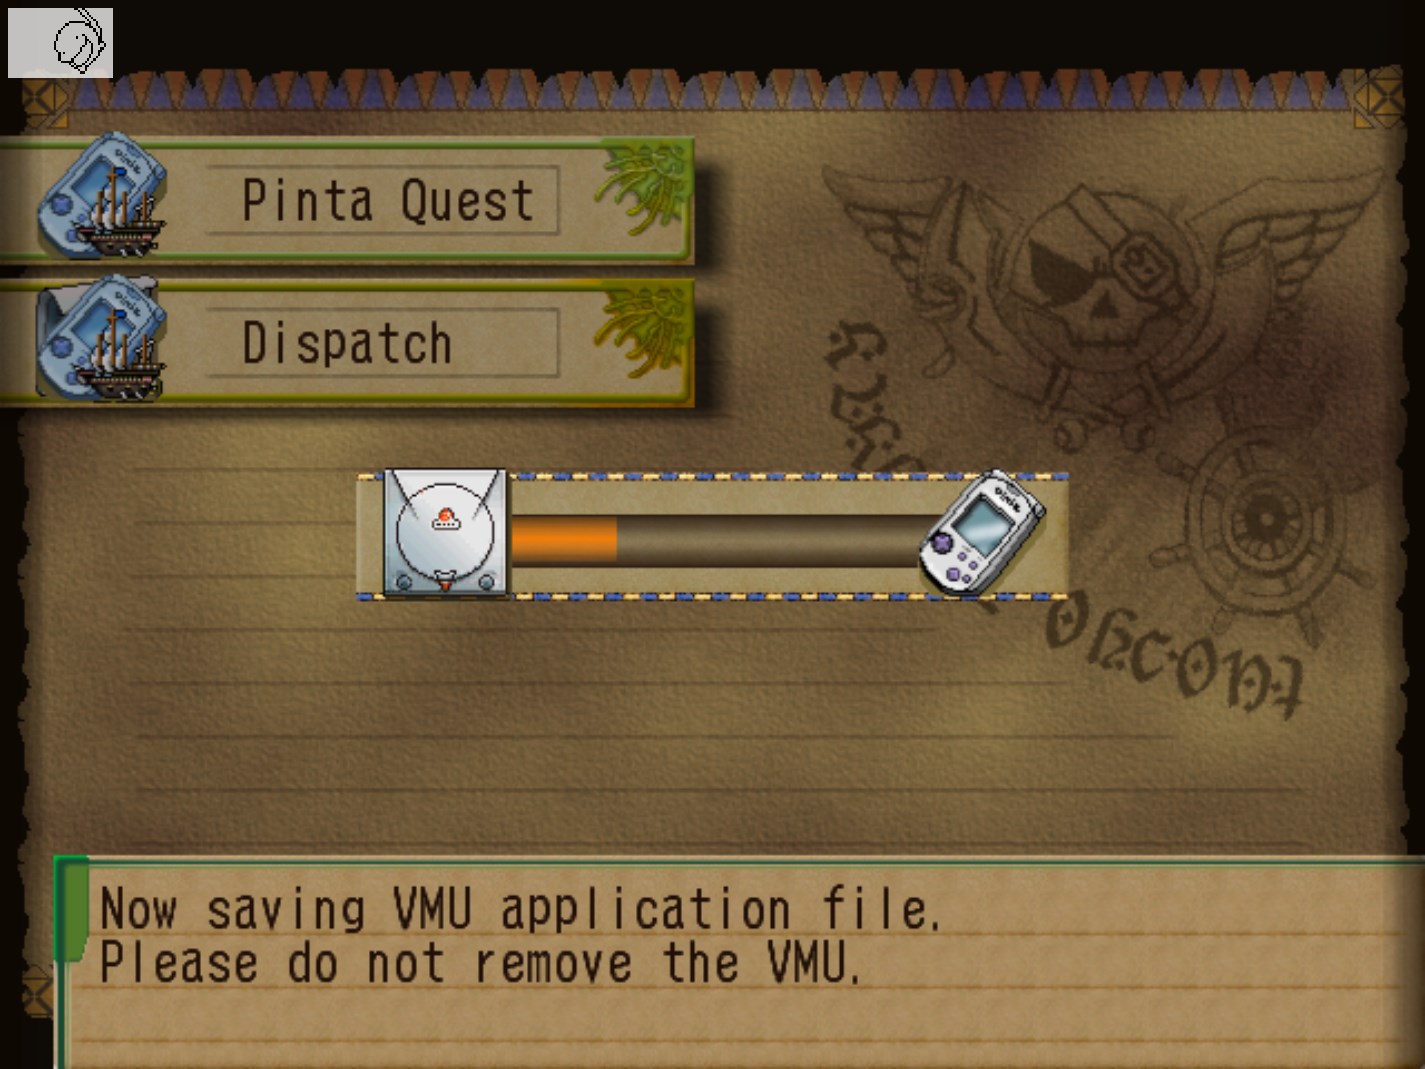
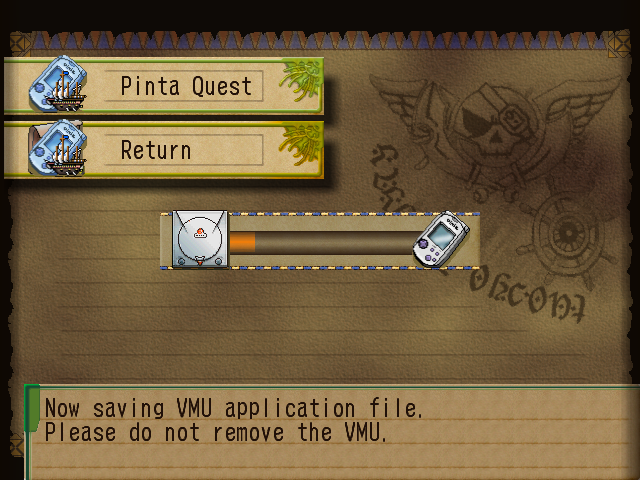
First, launch Skies Of Arcadia. Once you’re able to activate the Pinta’s Quest activity, open the Menu (whichever button you’ve marked the Dreamcast’s X input on), then hit Next Page. Select the Pinta Quest option once you’re there.
Goes without saying, but make sure you have enough space to ensure it’ll actually save! The file takes up 83 of the VMU’s 200 blocks. If necessary, select the BIOS from Flycast’s main menu (or Saves in Redream’s case), go towards the File icon, and delete anything unnecessary.
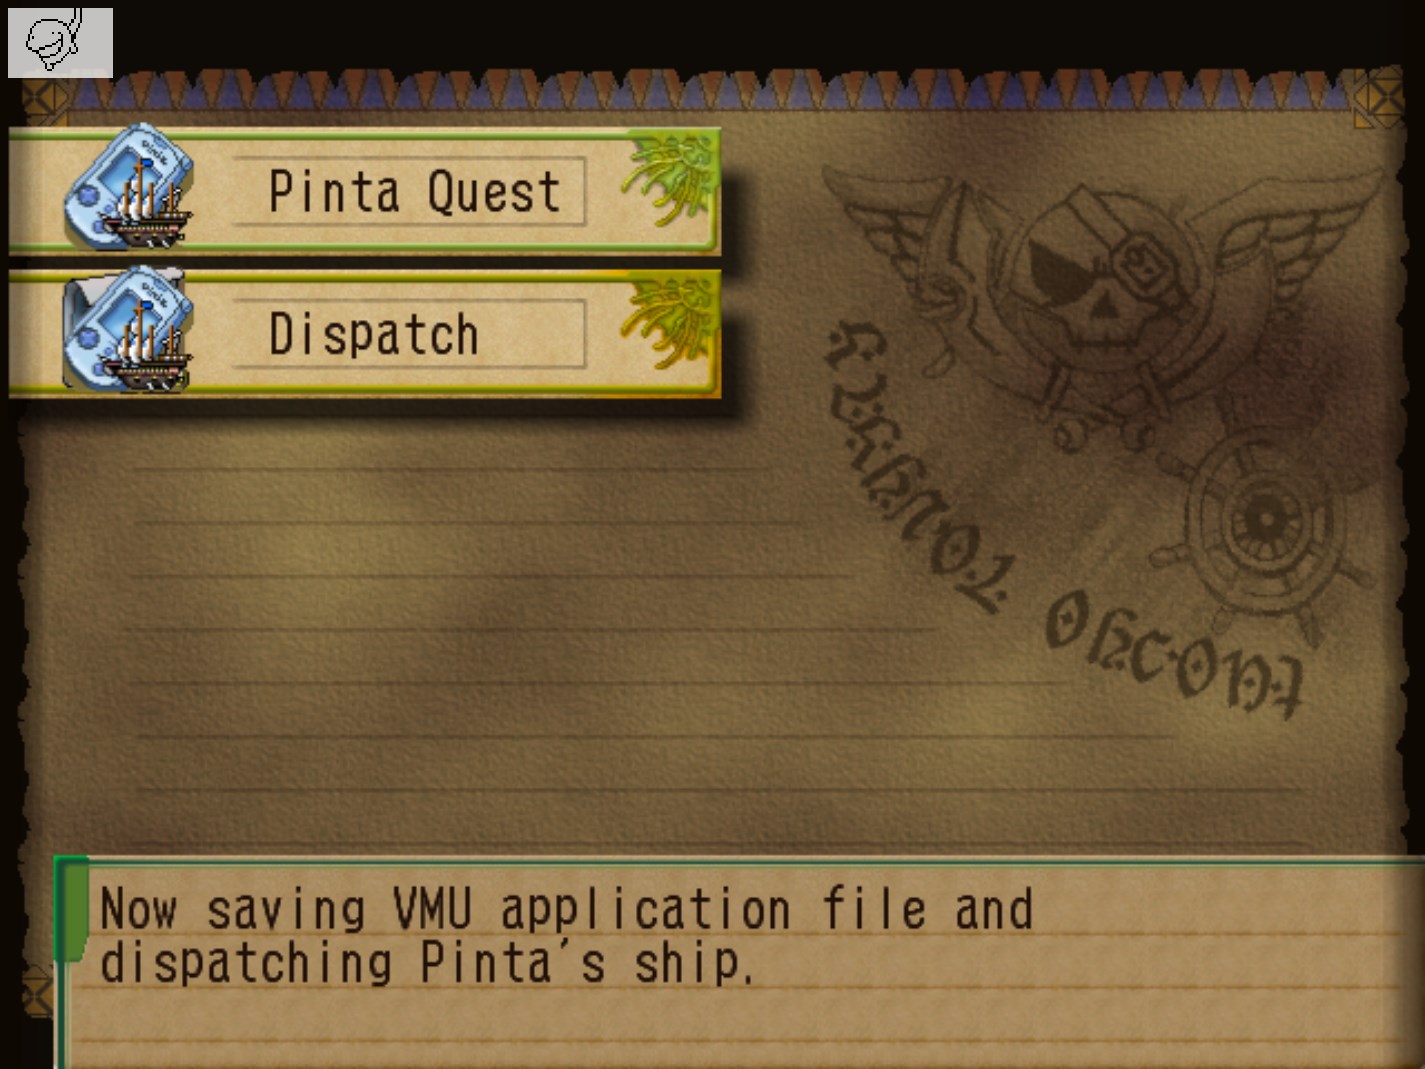
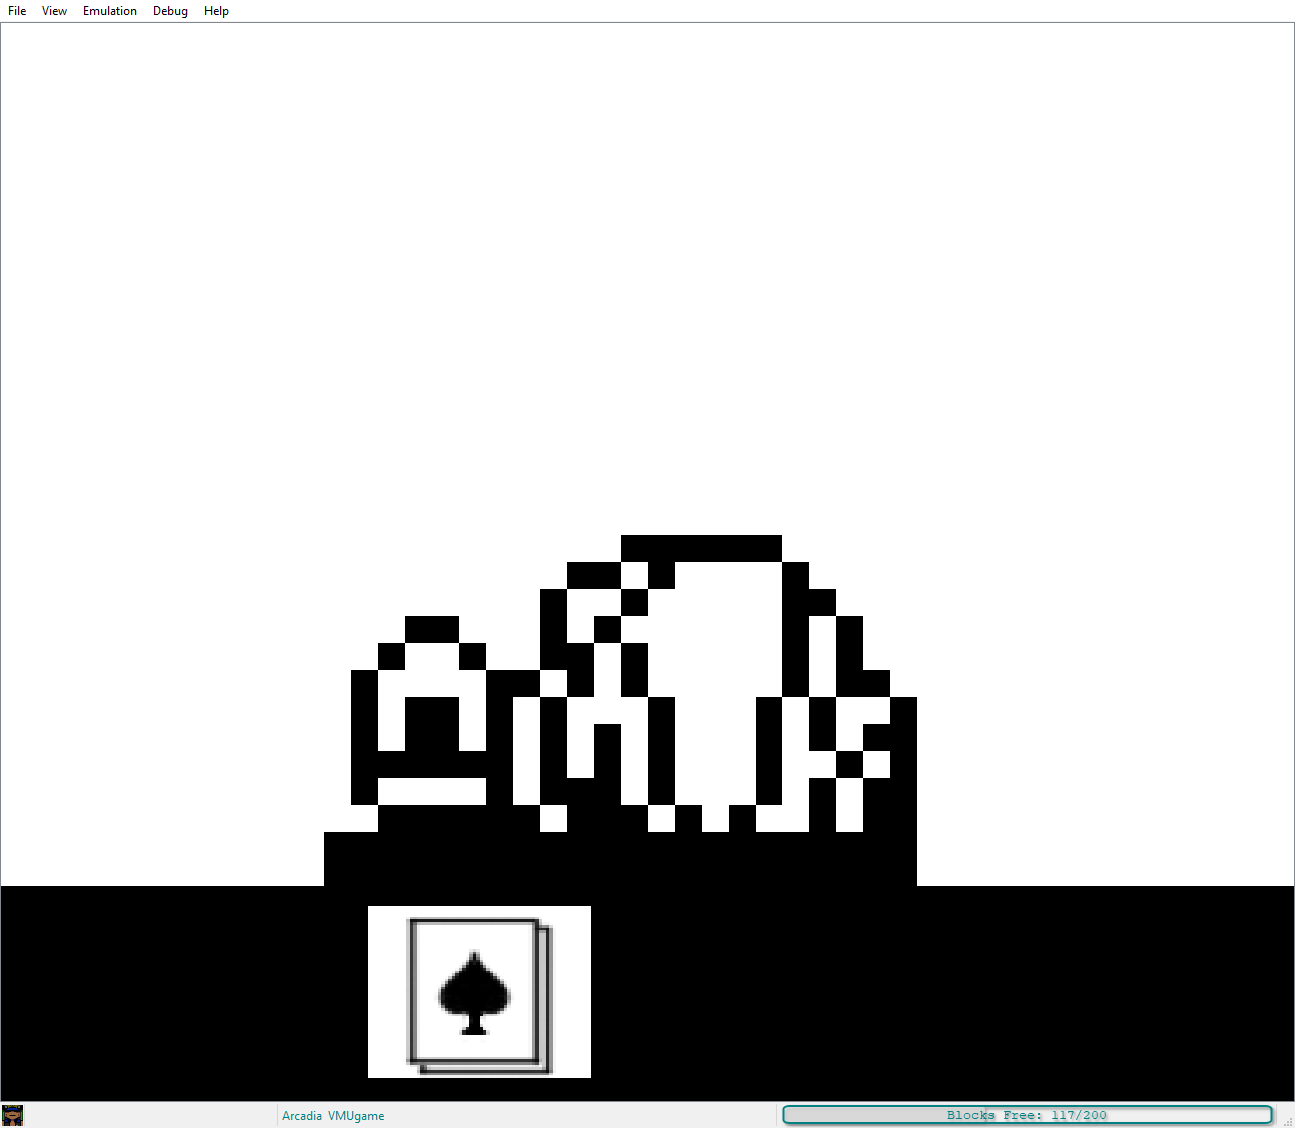
Once inside, select the Dispatch option. This will save a data file to housing the titular activity. You may need to press A twice to get it to save.
Step 2. Setting Up Exports
Open the VMU Explorer, then navigate to the folder containing your VMU files (for Readream, this should be in the Root, and for Flycast, in Data). For clarification, the PQ data I’ll be using from hereon is one I’ve already been working on prior to making this guide.
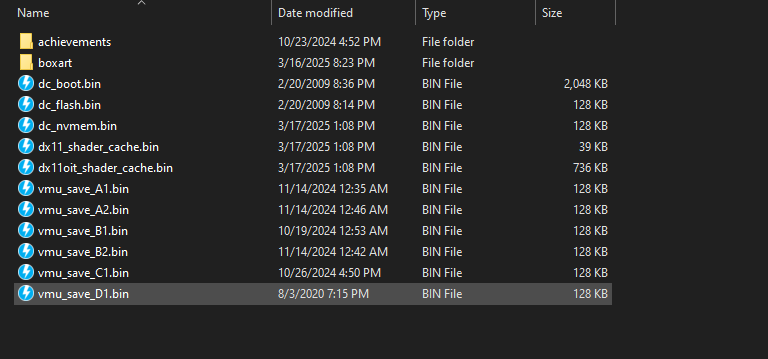 Image showcasing my Flycast’s data folder and its contents
 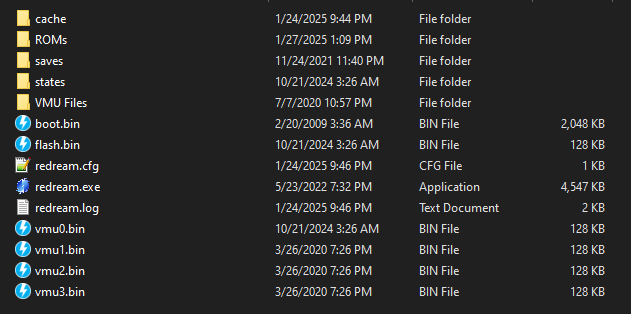 Image showcasing my Redream folder and its contents
Once there, double-click the VMU bin that contains the Pinta’s Quest data (in my case, vmu_save_A1.bin).
 The VMU Explorer program window, showcasing all of the items within it.
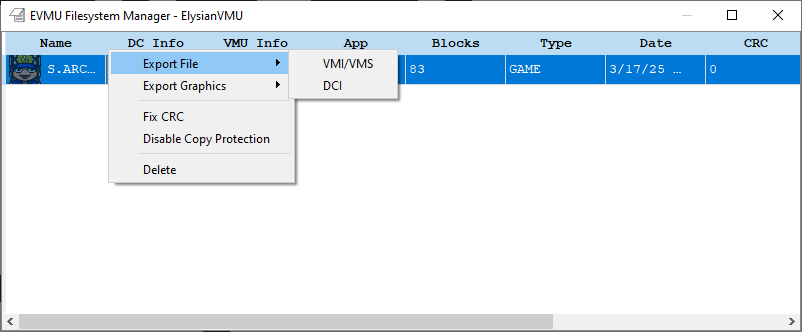
Hover over, then right-click, on S.ARCADIA_VM, AKA the one with the Arcadia VMUgame descriptor. Once the menu pops up, select Export, then save under the .VMI/VMS or .DCI format. Both will work, but I’ve had far greater consistency with the latter.
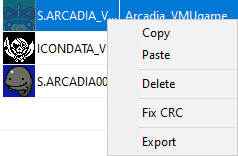
Once you’ve confirmed that the file has been exported properly, delete the one in the Explorer. We’ll need the space for an import afterwards. Go to File -> Save VM to keep the changes, then exit the program.
Step 3. Playing, Then Importing
Open ElysianVMU, then drag over the file you’ve just exported onto it. Once that’s done, two windows will open up: the main game window, and another for file management. From here, you can play for however long you want - you don’t even need to keep the window focused, it’ll allow for background inputs!
After you’ve had your fill of it, go over to EVMU’s other window, right-click on the only file there, then click Export once again. As mentioned prior, both formats work, but I’ve had consistent success with .DCI. When asking for where to save, place it somewhere else on your computer, not in the same location from before.
Open up VMU Explorer once again, and select the same VMU bin you used beforehand. Once there (and after making sure you deleted the first S.ARCADIA_VM file!), go to File -> Import File, then select the file you’ve just exported from ElysianVMU.
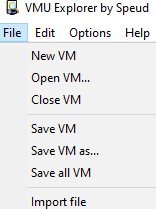
Afterwords, go to File -> Save VM once again, saving the import job, and exit. Once that’s done, open up Skies Of Arcadia again with the emu you’ve been working the VMU files on. Load a save - preferably the latest file - then go back to the Pinta’s Quest option in the menu again. You will now see a selection called Return. Activate it, and all the progress you’ve done on that VMU activity will successfully transfer over to your main game. Once that’s done, it’ll make another data file onto the VMU, allowing you to continue the process throughout your adventure in the game!
Addenda
- When playing, the inputs will be Xbox’s A/Playstation’s X for cancel, and B/O for confirm/status menu, and require a slightly harder button press for it to register. I don’t have a lot of third-party controller such as 8BitDo, so unfortunately I cannot relay which of those buttons are what.
- If you’re looking to get more out of the activity, check out slodeth’s GameFAQs page for an overview of what’s available, as well as Eso Arcadia’s page on it for further elaboration, as well as what Item C, B, and A are able to net you.
- For the Headwind minigame, it’s a lot easier if you “roll”, IE hovering then rhythmically moving your thumb up/down, between the two buttons then mashing simultaneously. I’ve gotten the bar to the top numerous times this way!
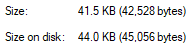
When exporting from ElysianVMU sure the file size of each VM data matches the one below. Very rarely it will output one of a lower file size, and can’t be registered by VMUE. If that happens, try the VMUE export file again, mess around for a bit and it’ll save properly then.